Perspective Fundamentals. Part three: Finding Vanishing points:
But how do we find a vanishing point?
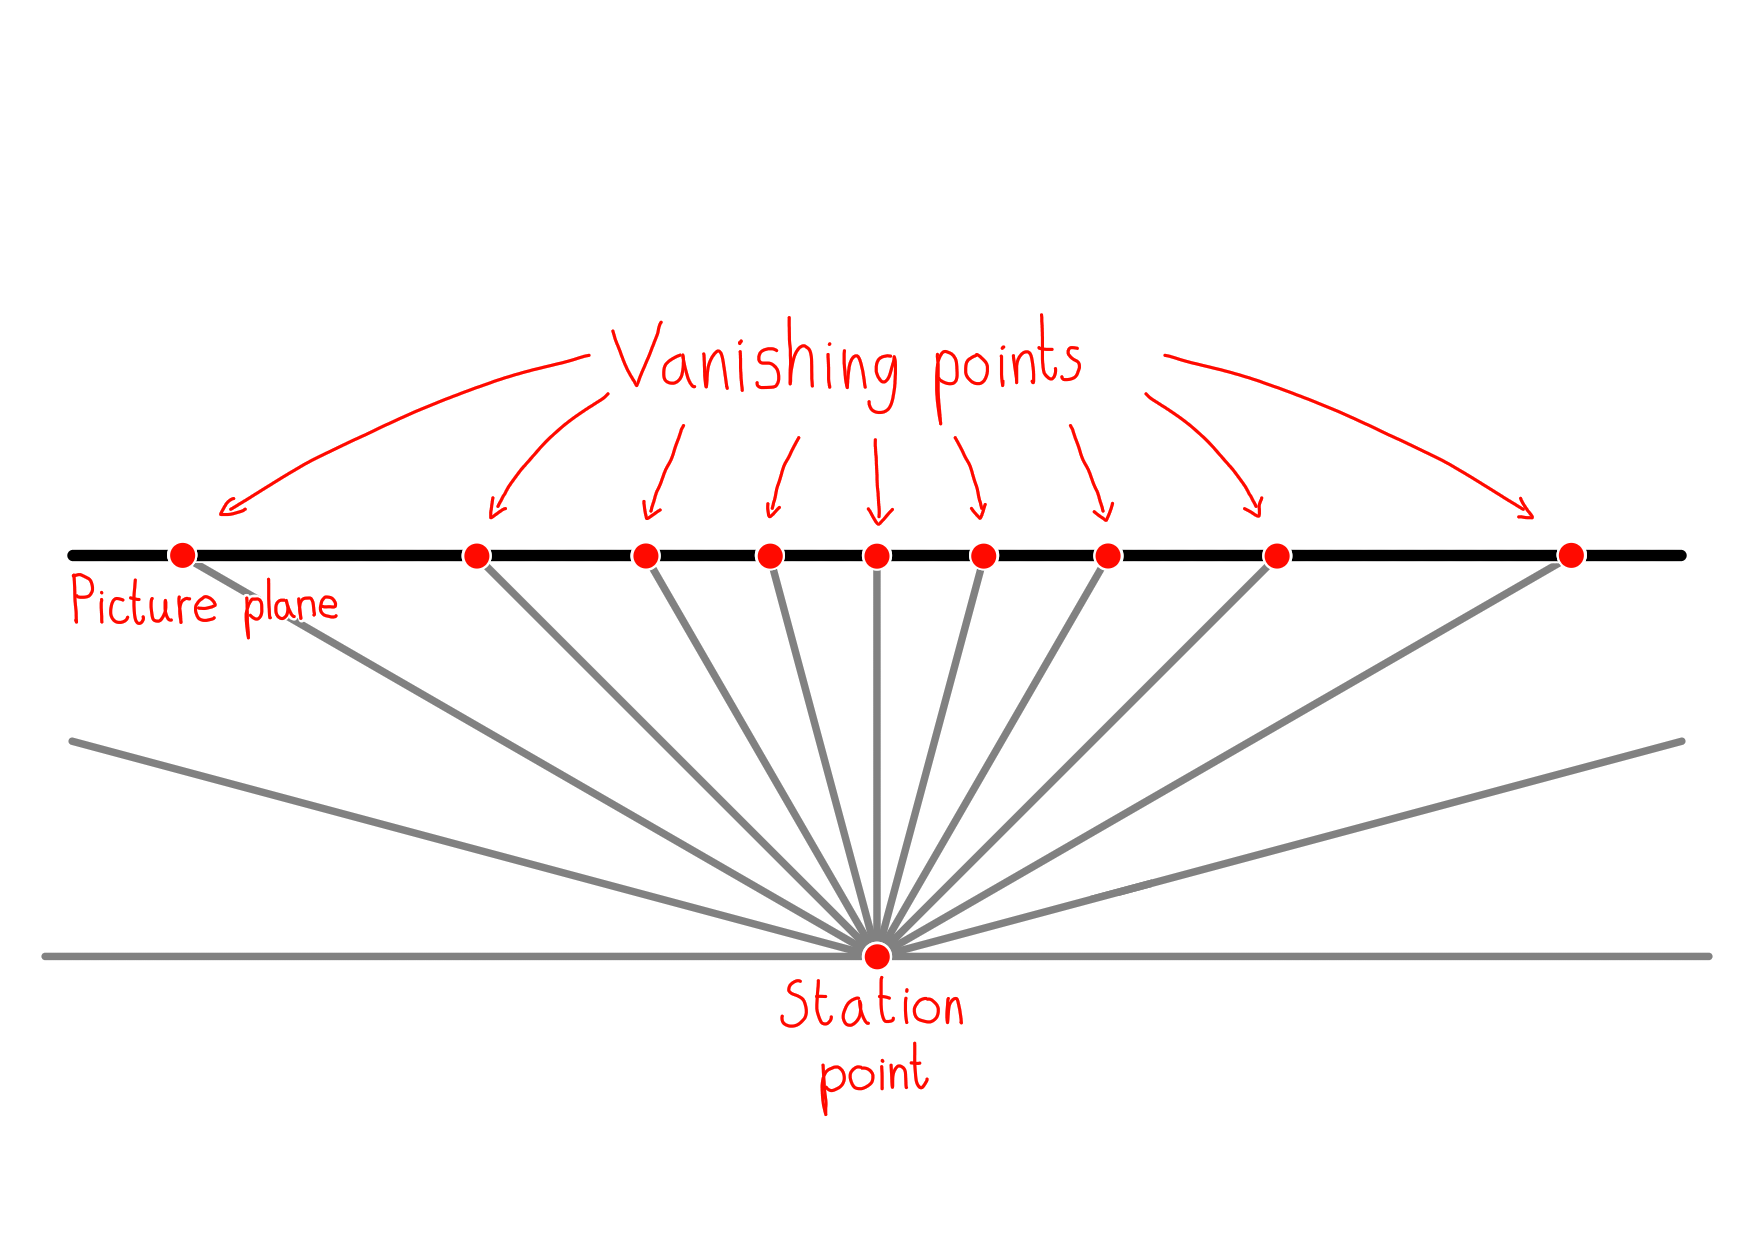
Using the framework we have so far you'd probably assume that we would simply draw a line from our vanishing point towards our station point, and see where it intersects our picture plane. However, since vanishing points are not physical objects but are representations of where we would perceive the end of infinity, that would be quite difficult. So to simplify this process, we draw the line in the other direction. Starting at our station point, and extending it towards where we would see our vanishing point.
But where would we see our vanishing point? That's simple, remember, all lines that are parallel with each other will always reach the same vanishing point. If you want to find a vanishing point for a specific line just stretch out your arm so that your arm is parallel to it, and you are now pointing towards it.
If you want to find a vanishing point for lines that are pointing straight up, you look straight up. If you want to find a vanishing point for lines that are pointing straight ahead, you look straight ahead. If you want to find a vanishing point for a line that is five degrees to the right of a different line, find the vanishing point of that line and look five degrees to the right.
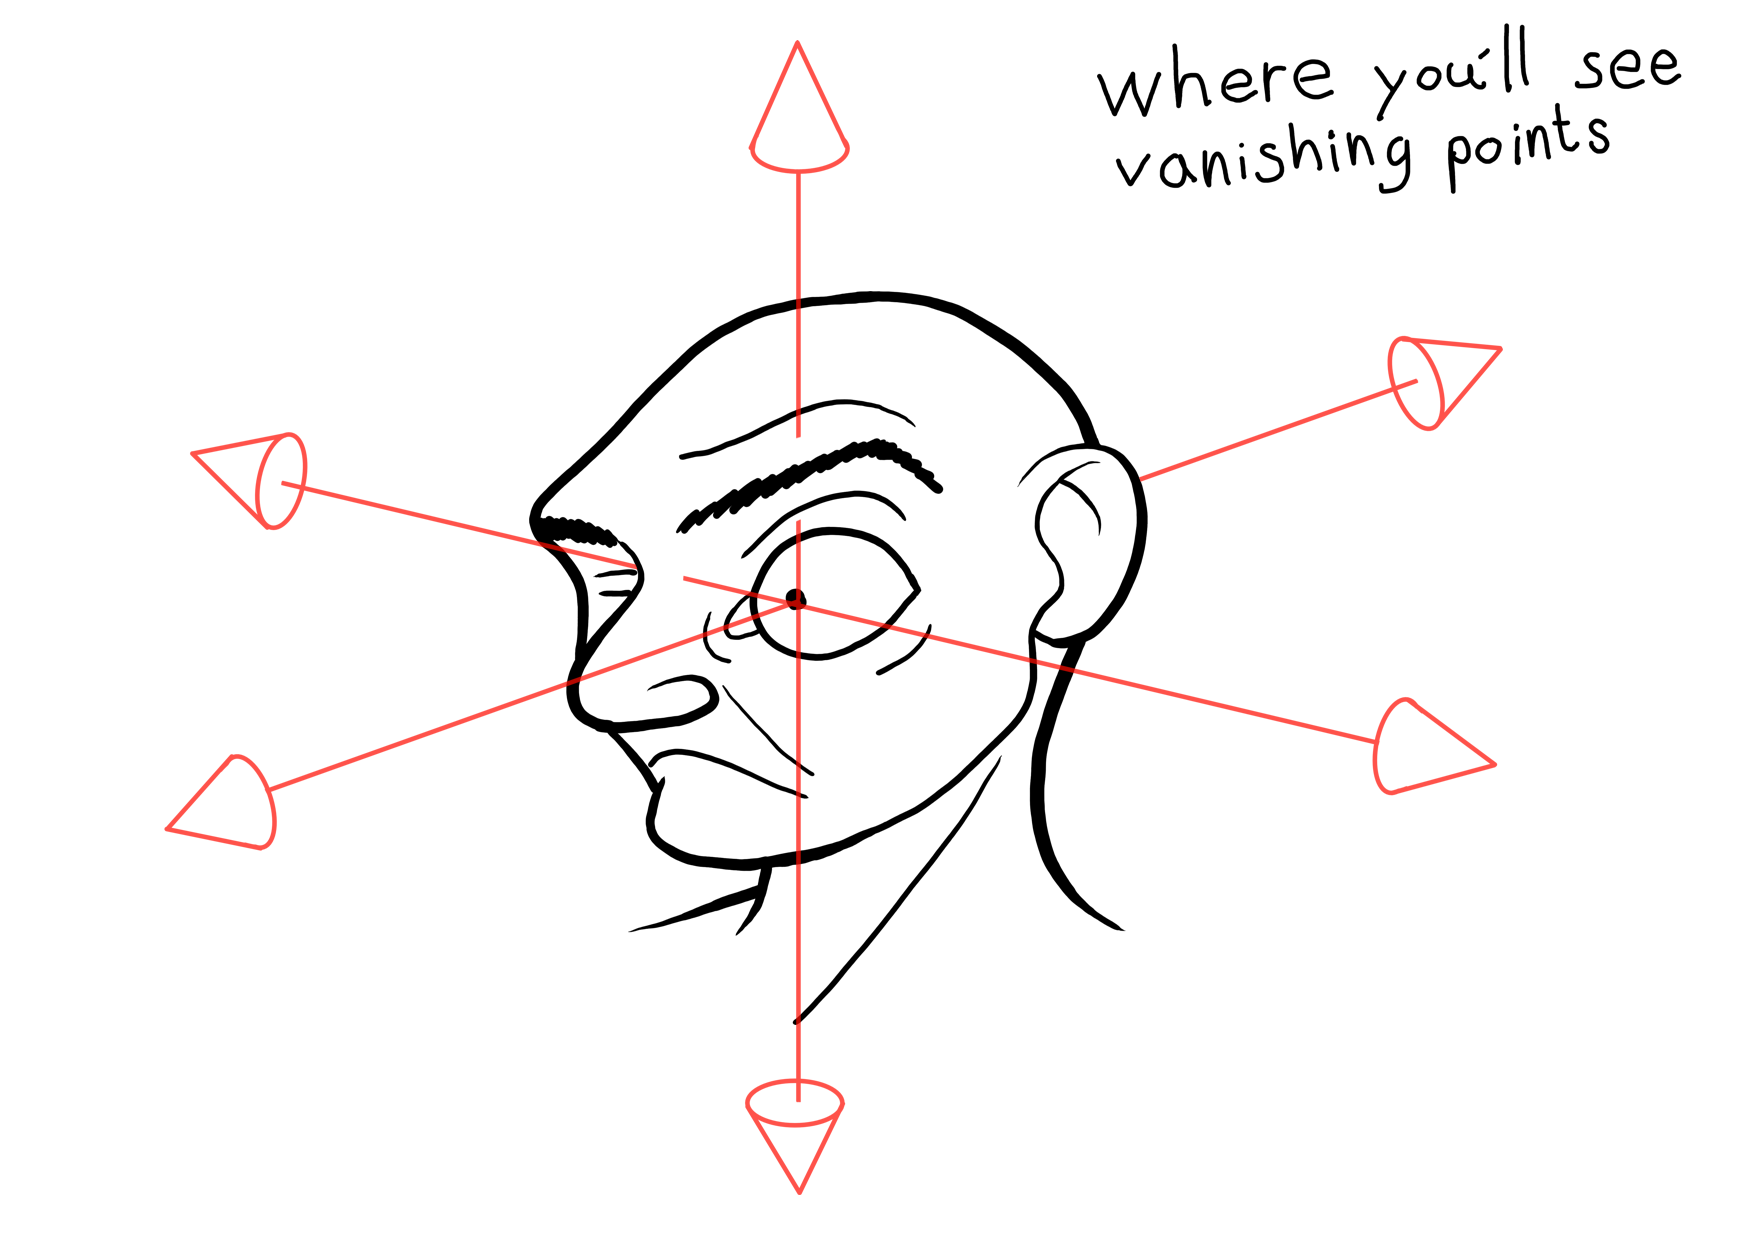
Just position your eye at the station point, and you can easily find vanishing points by simply looking in the direction where a vanishing point would be and marking down where you end up looking at your canvas.
(Note: if the line you are measuring is parallel to the picture plane then those lines don't need a vanishing point, just draw them parallel to it. And if the line you are measuring is moving away from the picture plane then you are extending the line in the wrong direction.)
That is the basic theory behind finding vanishing points. Now, let's get into some more advanced techniques.
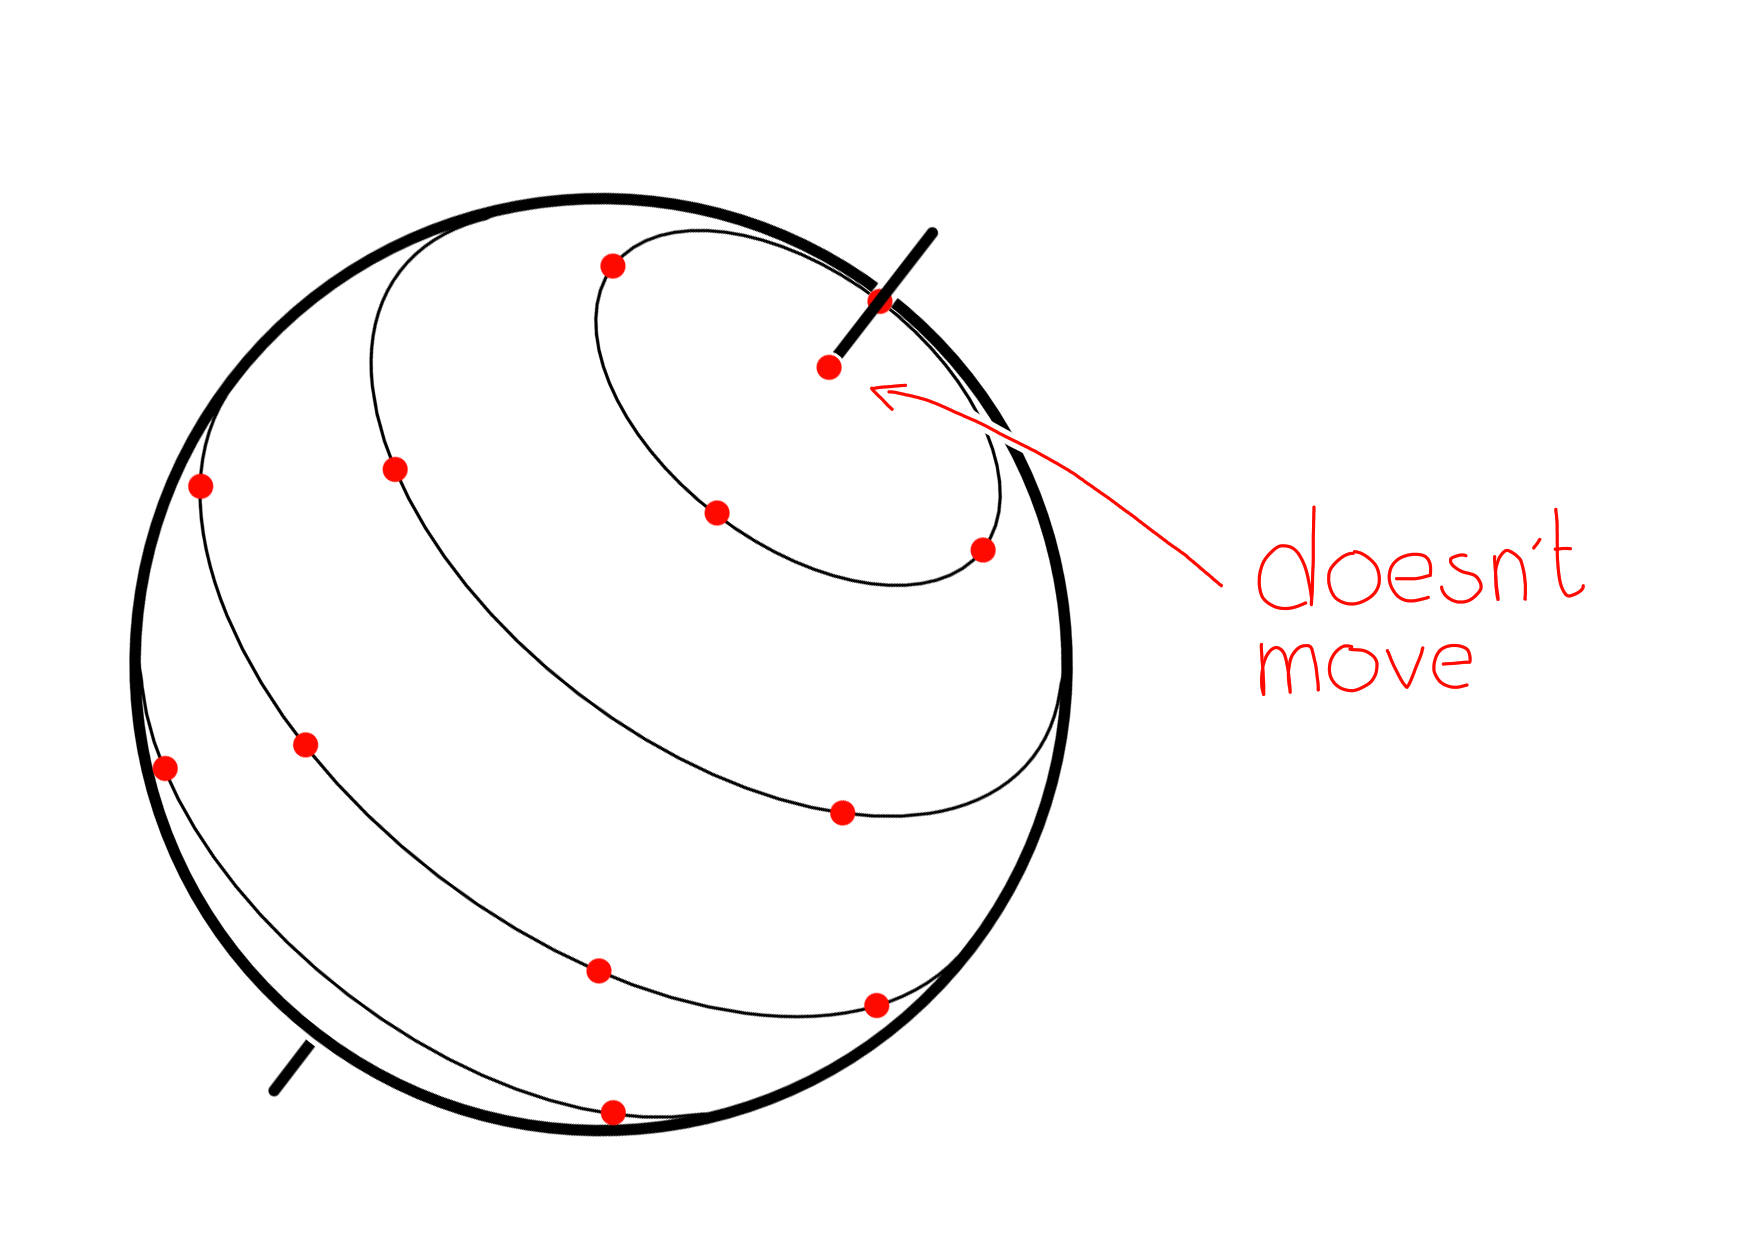
When an object rotates the points that are on the axis it rotates around never moves. They just spin in place
If you've studied perspective before then you'll know that all lines that are parallel with the ground will have their vanishing points on the horizon (I'll cover this more in the next lesion). If we treat our horizon as an axis of rotation then we can rotate the station point whilst preserving the locations of our vanishing points.
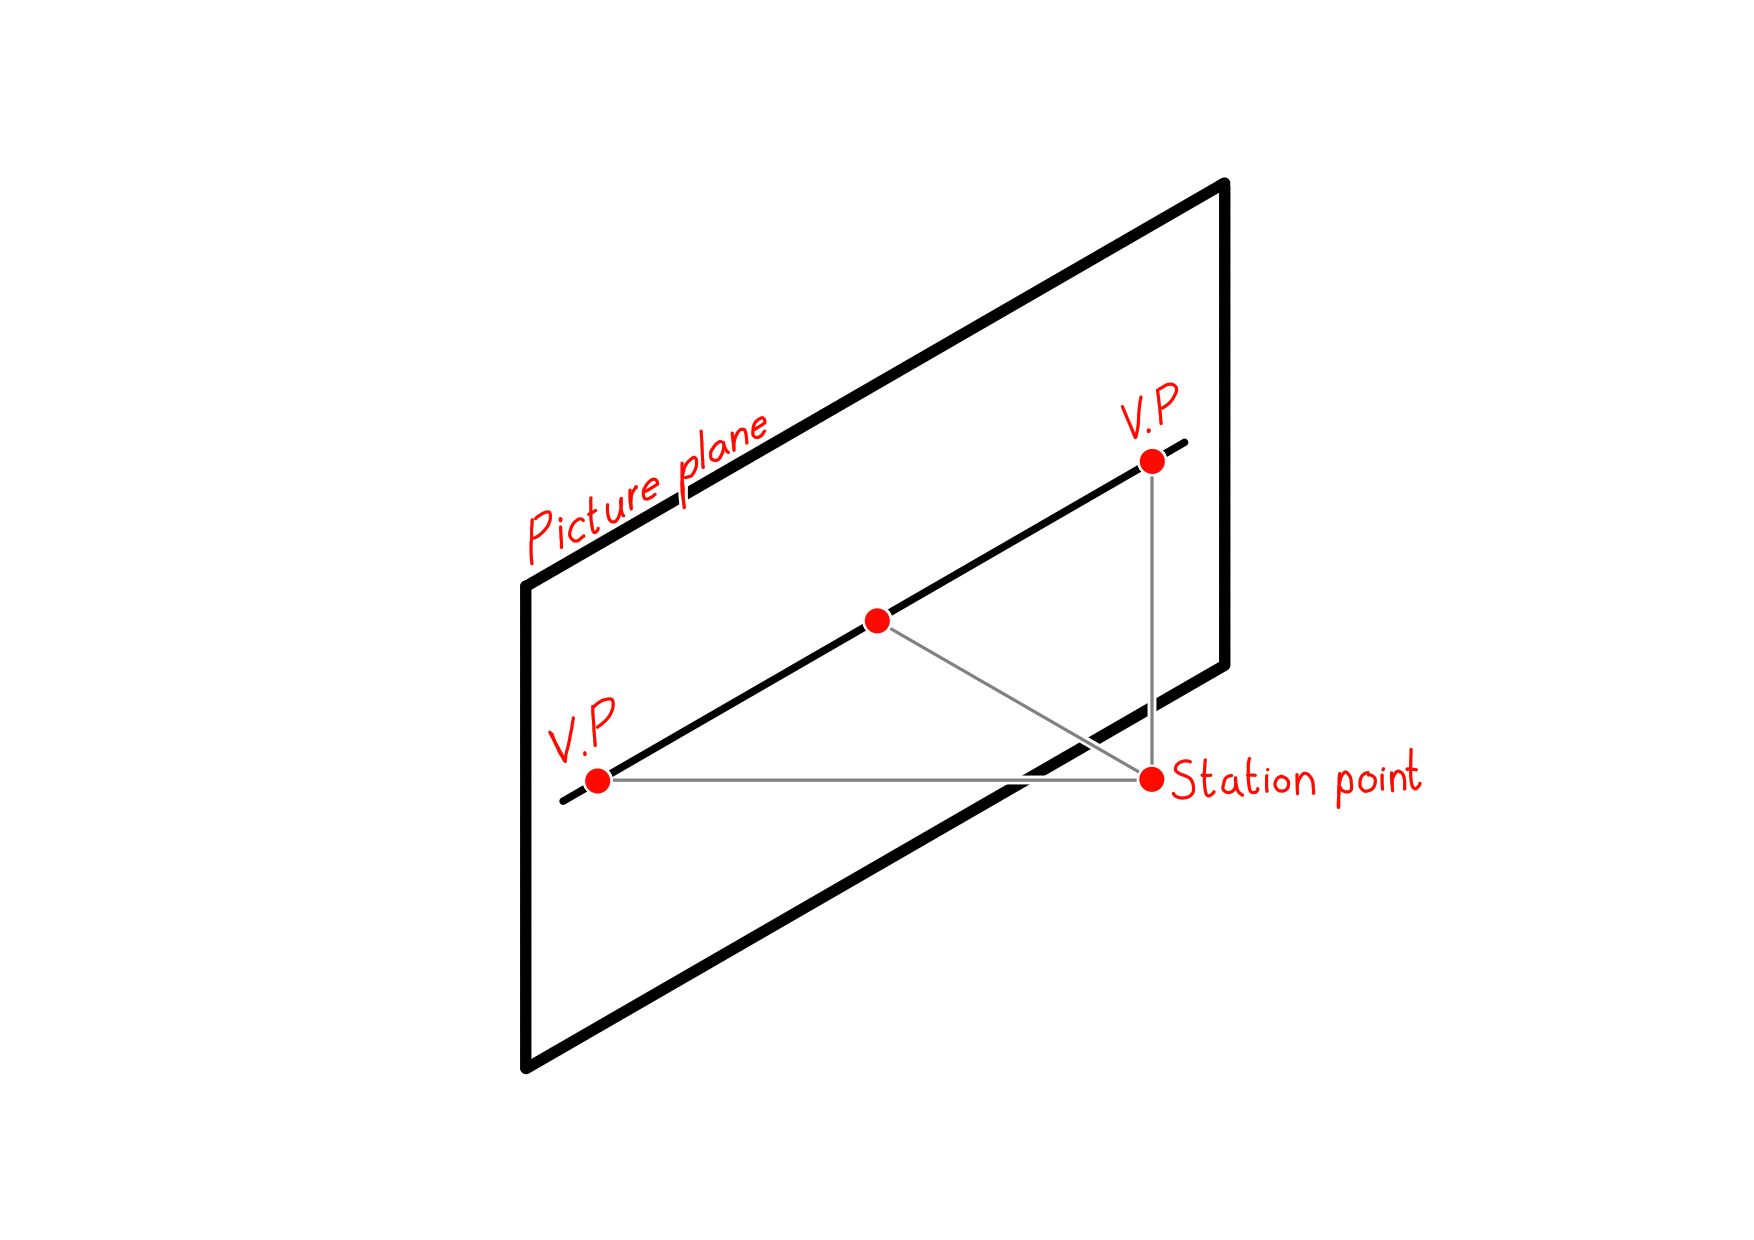
We can then rotate it until it lies flat against our canvas, allowing us to easily draw it and measure our angles as needed.
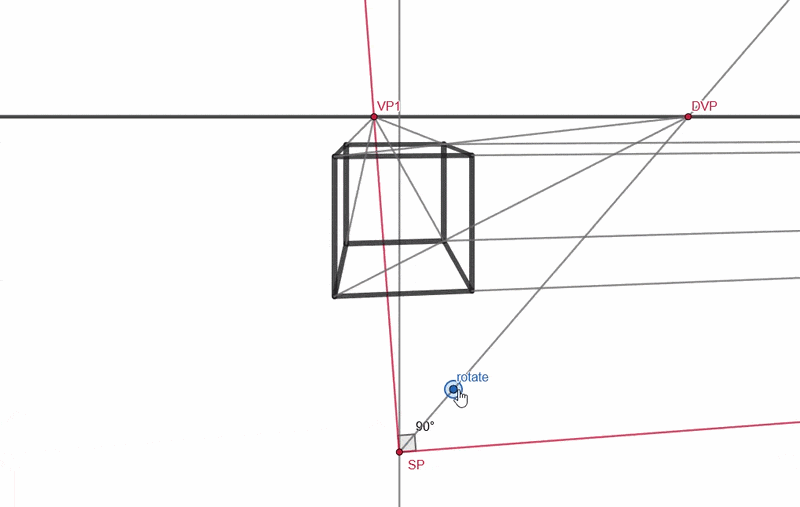
This exact method works only when the camera is looking straight ahead. Otherwise, the distance between the horizon and the station point will be off. If you are drawing in three point perspective then this technique will have to be modified a bit if you want all of the measurements to be precise.
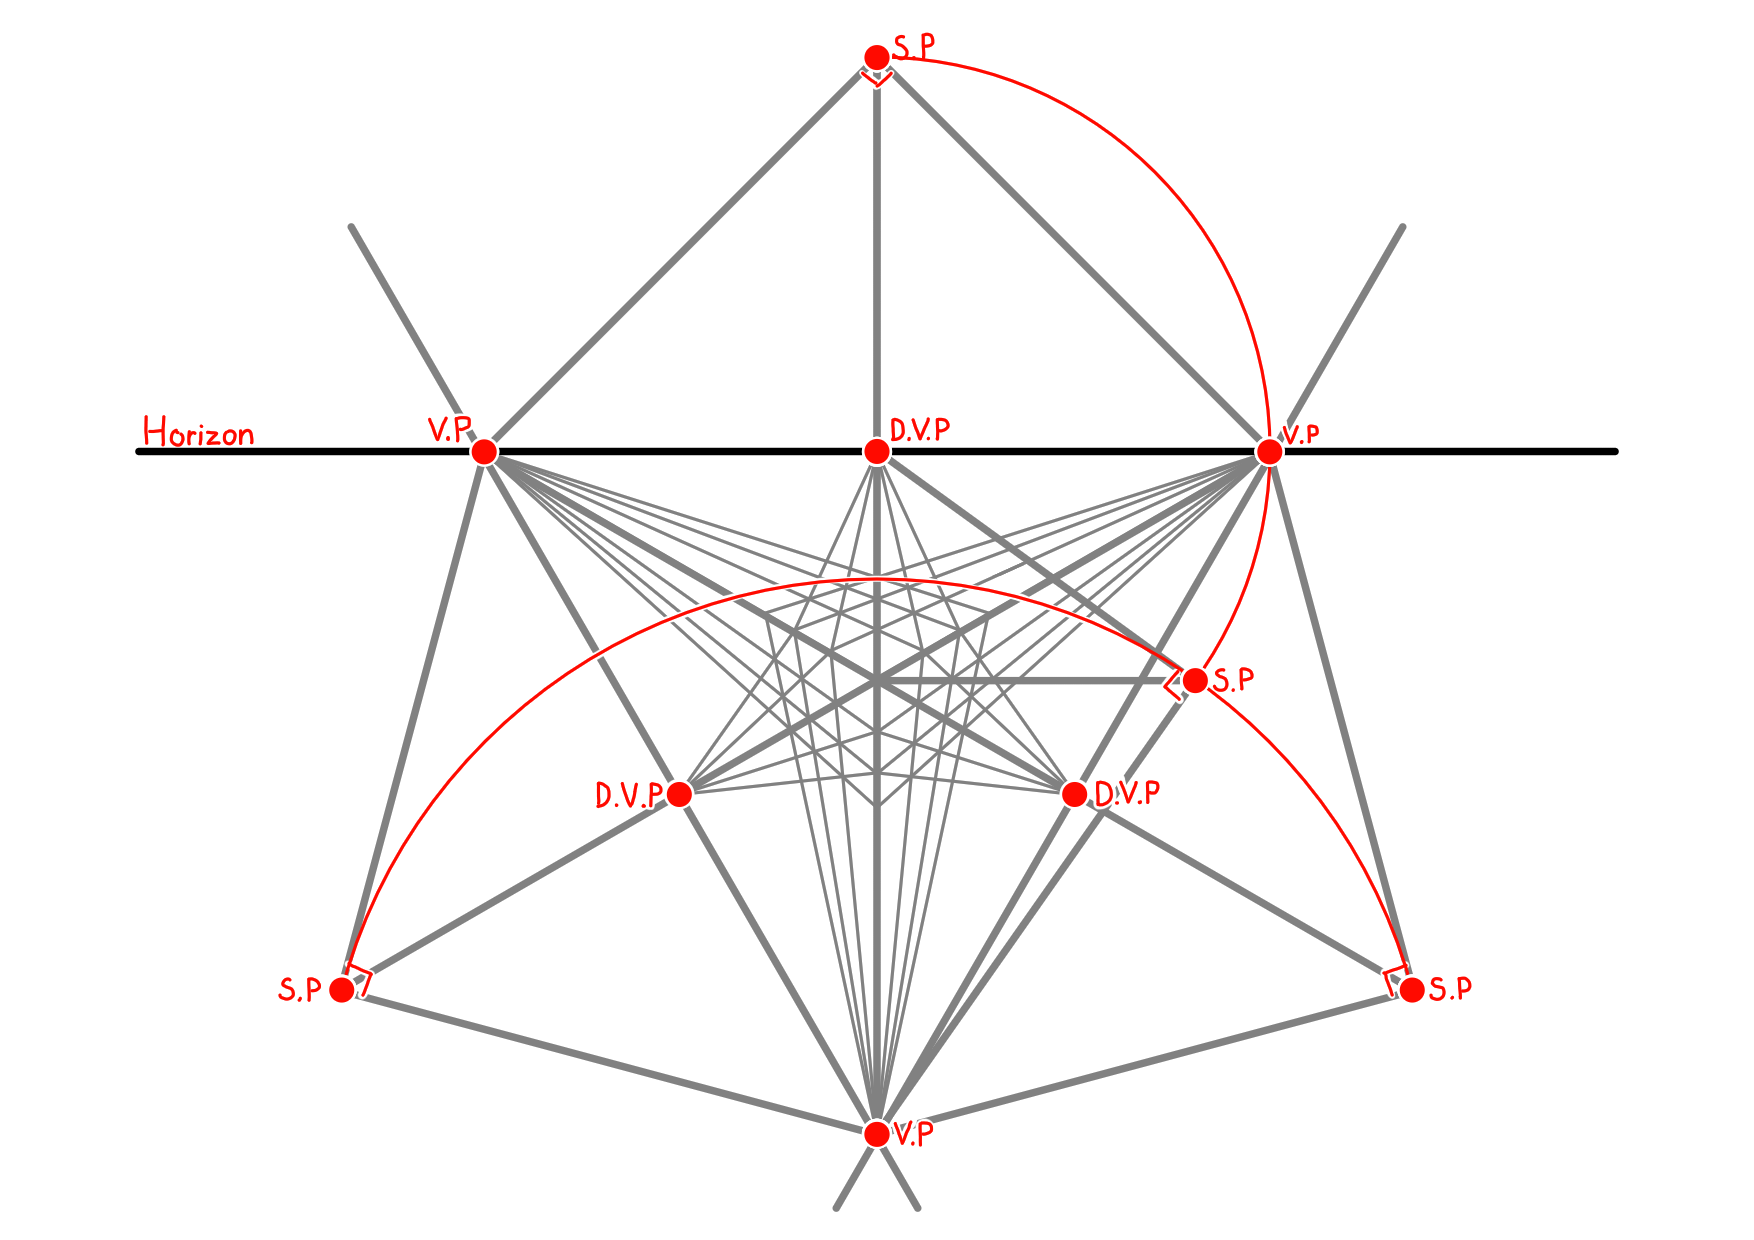
Exactly how to set this up will have to be covered a different time. But the basic principles are all the same. You just rotate the station point around multiple different axes to get measurements that will help you rotate it around more axes. But for now, there are still some other details that I would like to cover.
If you are peeking through a keyhole then you will be able to see way more on the other side of it if you are close to it, compared to if you were to stand three meters away.
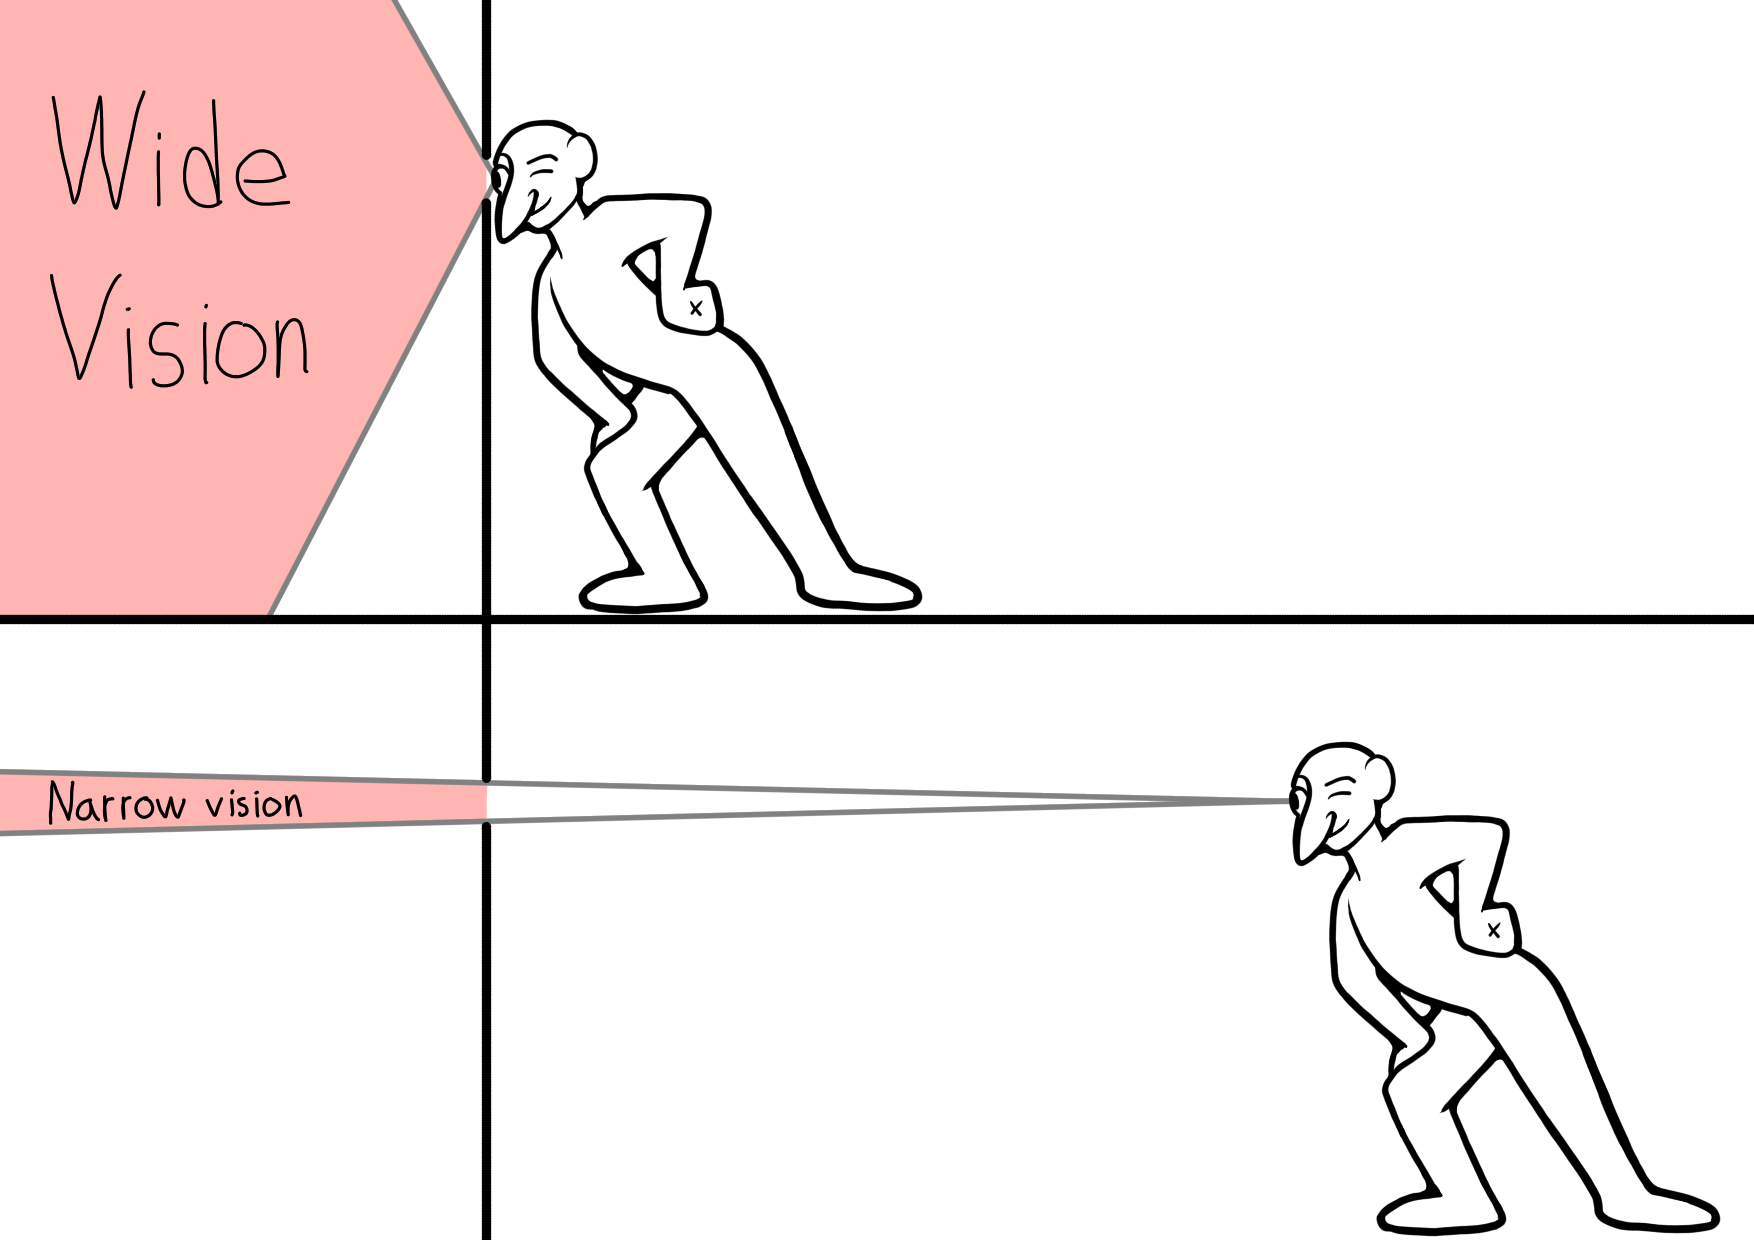
This is how you control the field of view in perspective. The closer the station point is the wider the field of view is, and the farther away it is the narrower it is.
We can figure out the exact field of view in our drawings by adding what is called a “cone of vision”.
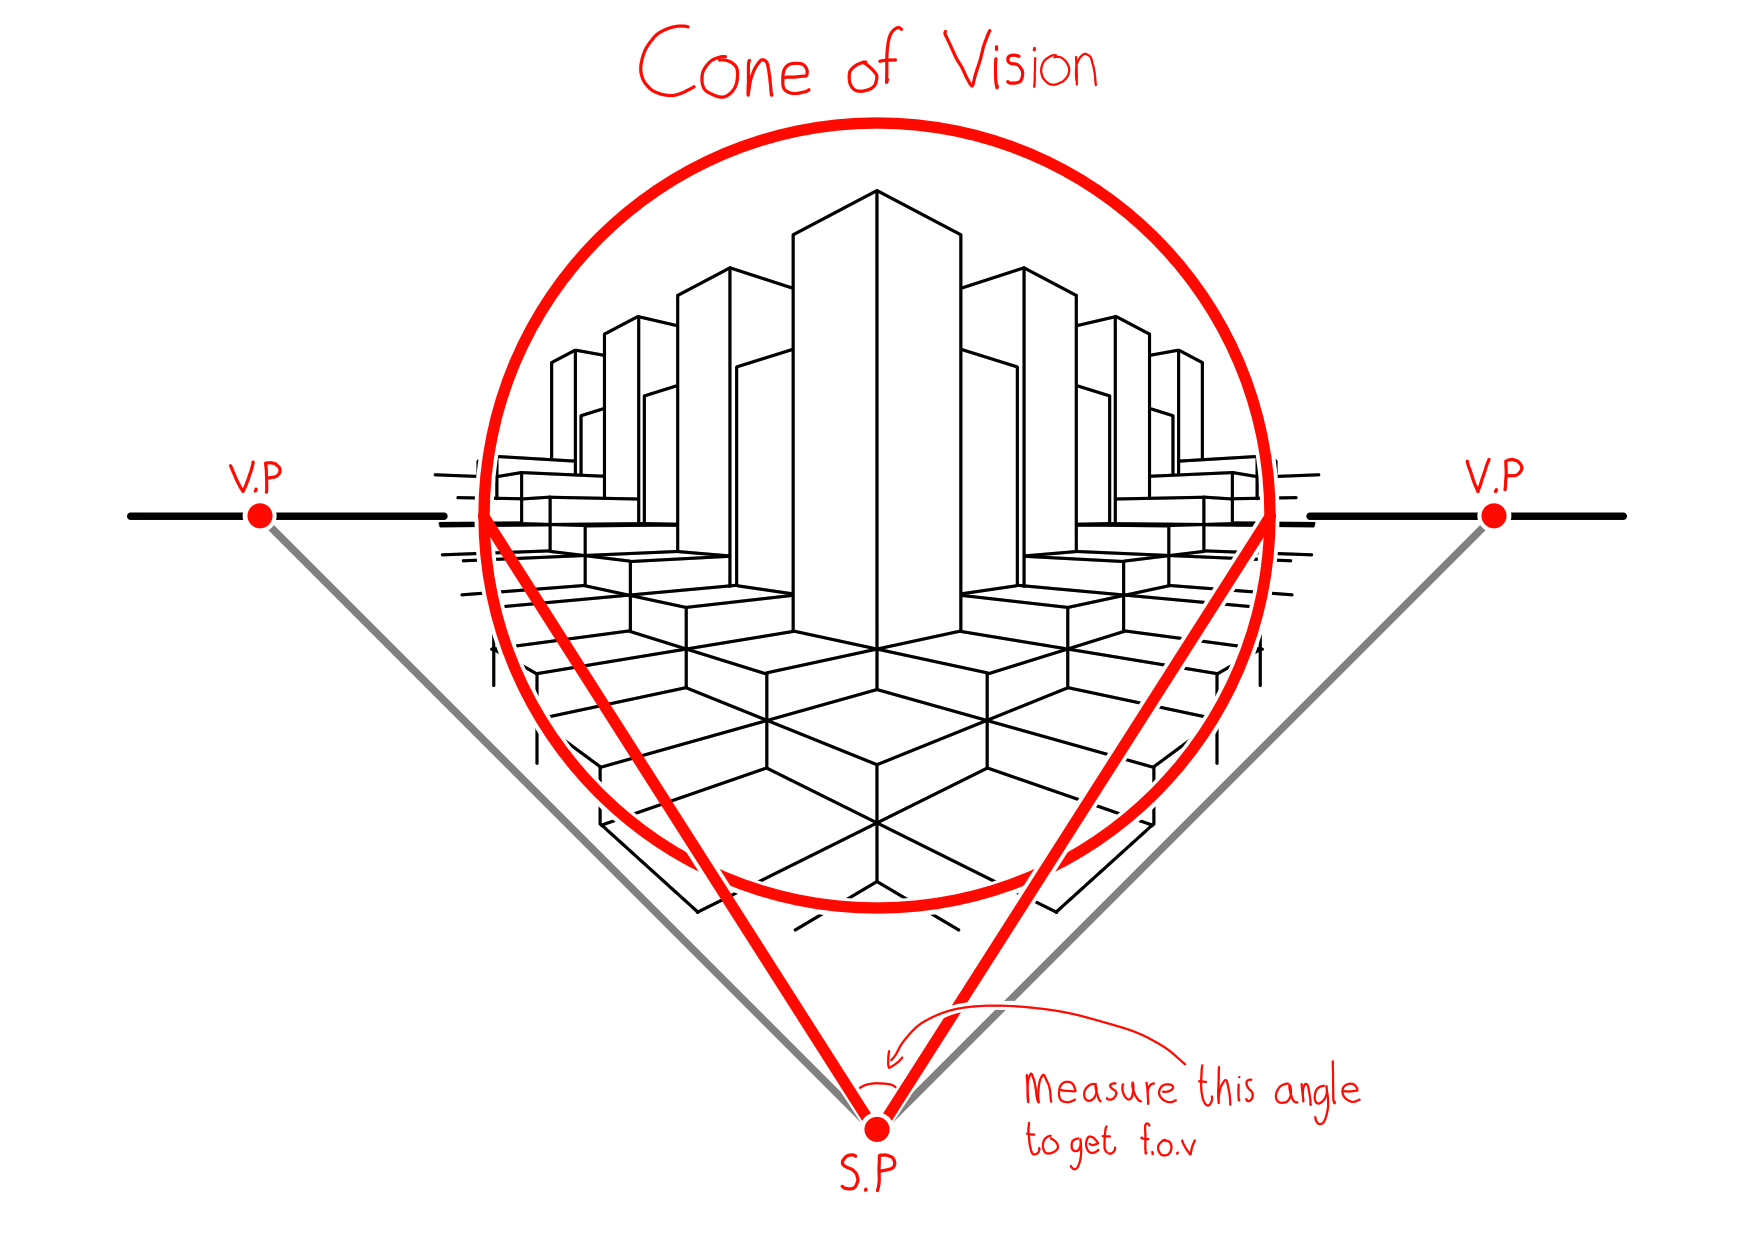
The idea is that you add a circle around the center of vision representing the area you want to draw in. This circle is the base of a cone that has its tip at the station point. This cone is the cone of vision. When the station point is rotated then we rotate the sides of this cone with it, allowing us to measure the angle of the tip at the station point.
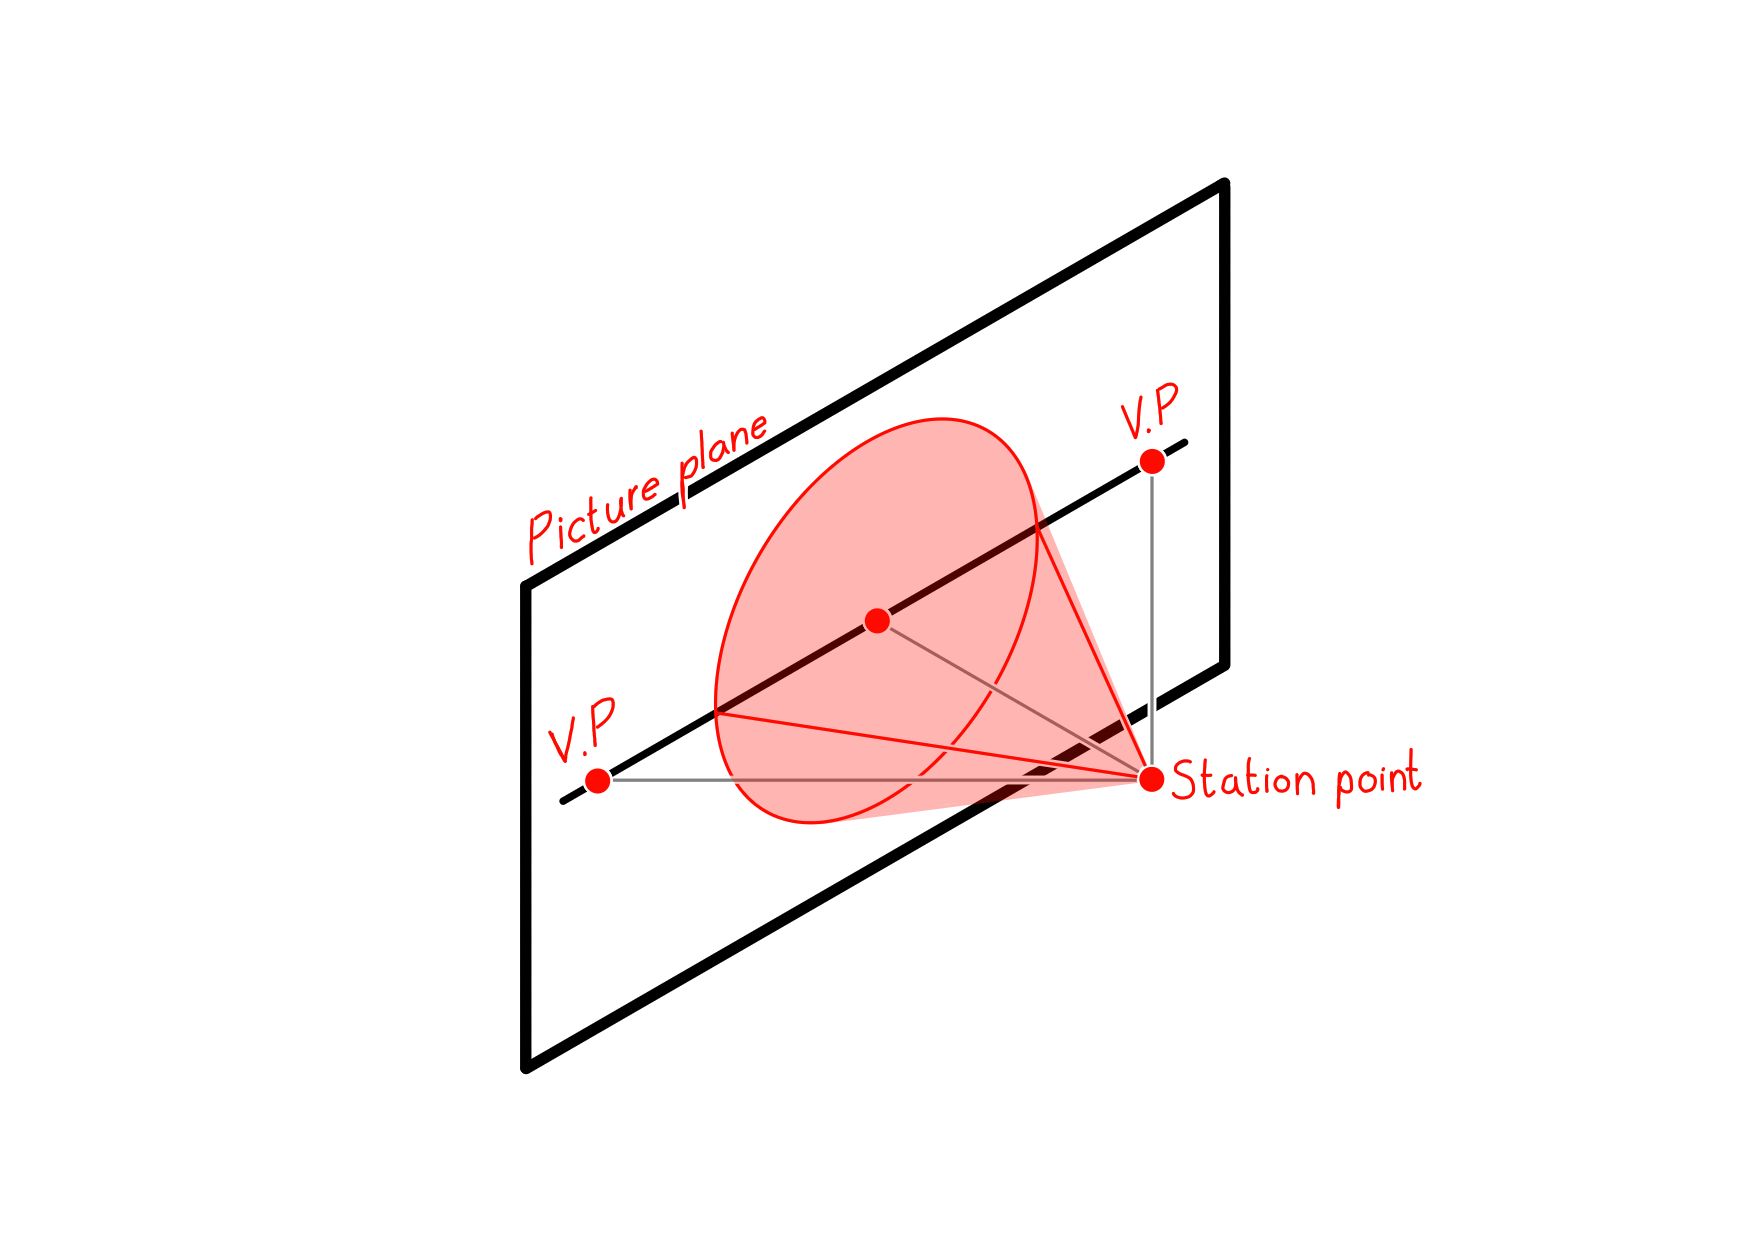
The field of view for a standard drawing tends to be around sixty degrees. This is achieved by having your station point be slightly less than your canvas width from your canvas (~0.866025 of your canvas width if you want to be more precise).
The last thing I want to cover in this lesion is where to put the focal point.
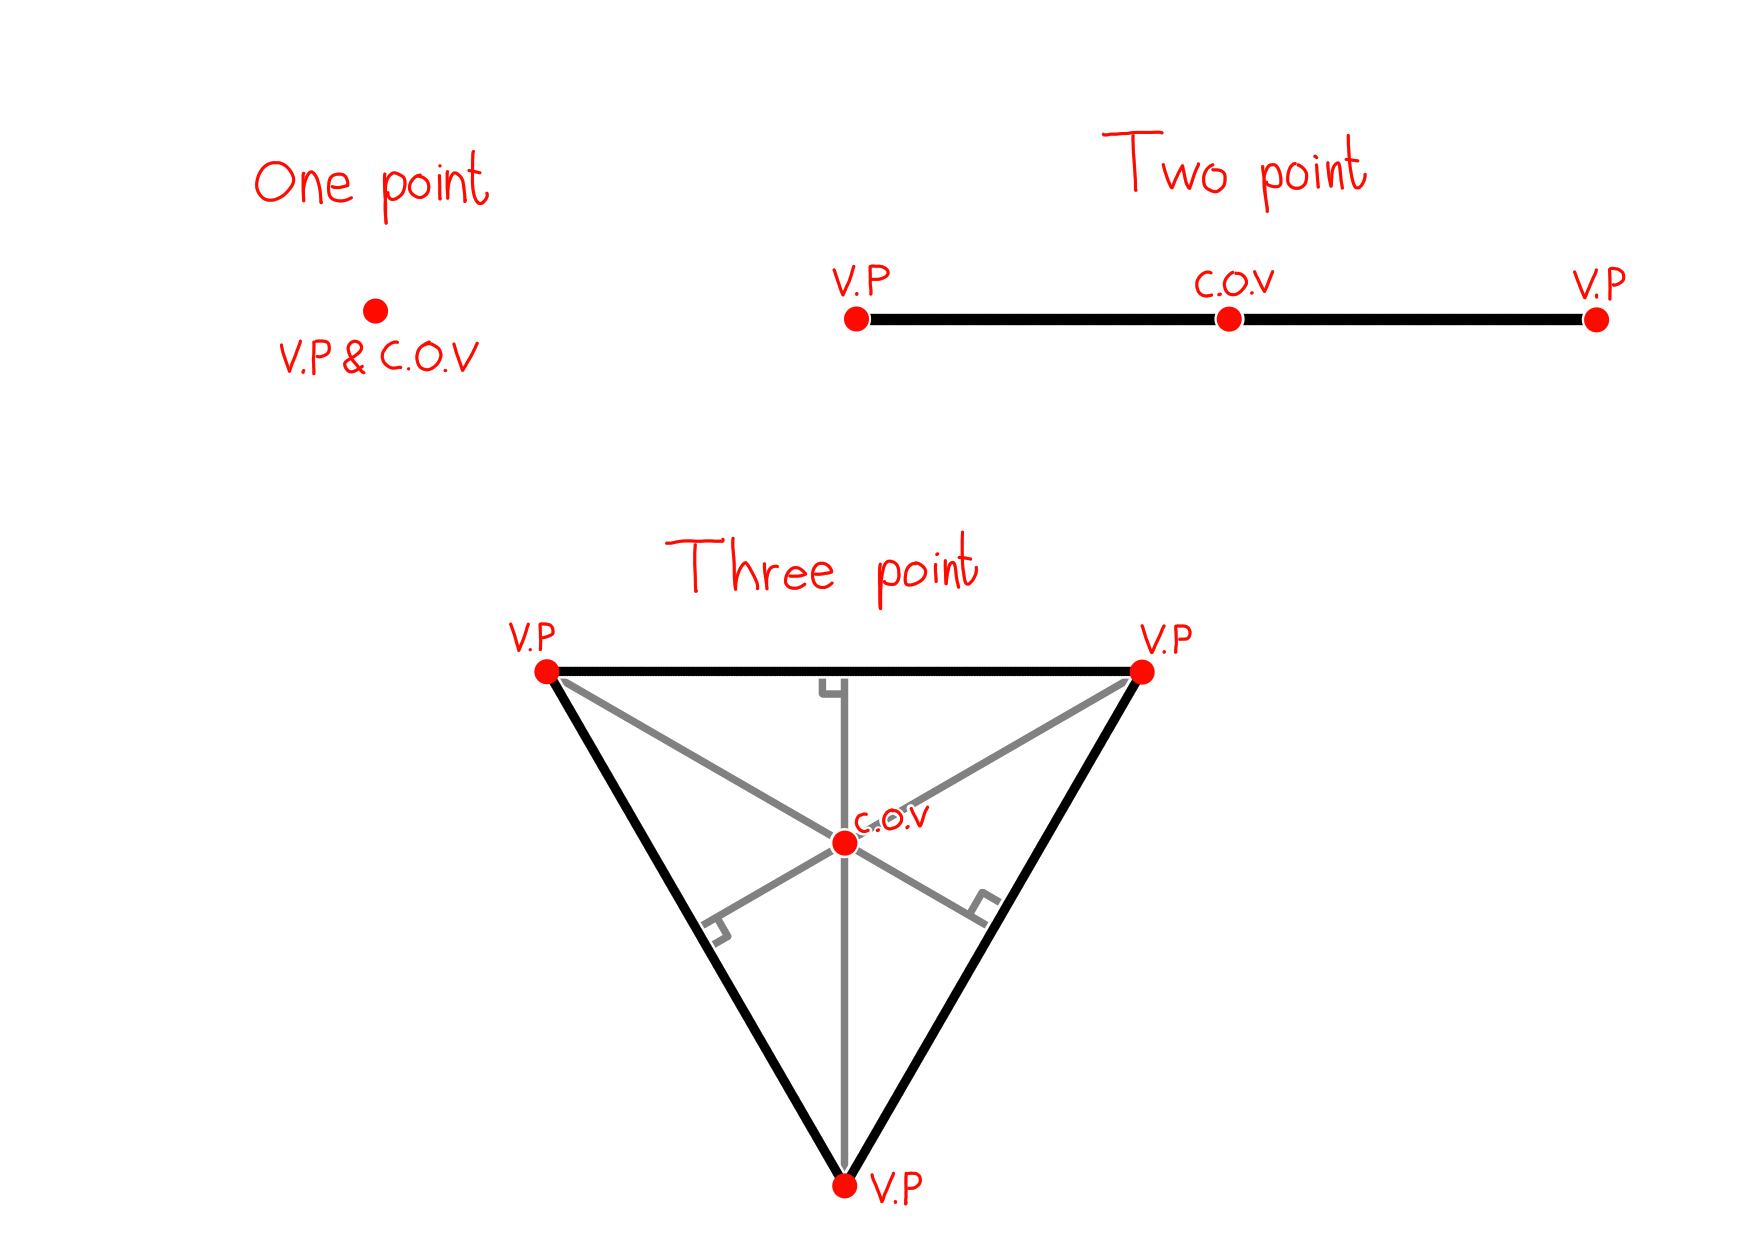
The point on your picture plane that is directly below the station point, the point that is closest to your station point, is called the center of vision. It is here where you typically want to put your focal point. Knowing this, we can figure out where the focal point should be relative to our vanishing points.
In one point perspective, the vanishing point will overlap the center of vision. A lot of people consider one point perspective to be a bit stiff compared to the other ones. But when used correctly, one point perspective will have the entire background point towards the focal point.
In two point perspective, the center of vision will fall on a straight line going between your vanishing points. It will not always be perfectly in between them. It will often be closer to one vanishing point than the other. But it will always fall somewhere on that line.
Finally, in three point perspective, the center of vision will always be at the orthocenter of your vanishing points.
If you want to go all out on mechanical perspective then you can very easily end up cluttering up your entire canvas with a lot of minor techniques like these. Which is why I want to clarify that I neither expect nor want you to do that. The reason why I cover these is because I find the internet to be inundated with people who are eager to skip the “complicated theory” in favor of drawing exercises that promise to give you the ability to eyeball it after you've done them for a couple months (although I suspect that most of them only do this because they were never taught any theory either).
When I started learning perspective it was not uncommon to find people who would teach you methods for finding vanishing points that were more complicated and less accurate than the “advanced” methods that they were supposedly saving you from. And when I finally found people who would teach me these advanced methods, they would usually only teach it exclusively in the form of a step by step tutorial that didn't cover why they worked. I found a disturbing amount of sources who would teach me how to draw an advanced perspective setup used for finding the exact location of any vanishing point I wanted way before I found any source explaining any of the theory needed to understand why they worked. They were exclusively being taught as this collection of magical lines and angles that, when drawn properly, would magically give you the answers to your problems. The first couple of years of me trying to teach myself perspective on the internet felt a bit like being taught math by being handed multiplication tables without ever being told what multiplication actually is. This is why I've been focusing so much on theory in these lesions. Not only because I find that it's been severely neglected, but also because I think that theory is the most important part. Not only does understanding theory help you to eyeball it a lot faster than just blindly doing some exercises until you magically get a feel for it, but understanding theory is also what allows you to engage in actual problem solving. To be able to come up with your own solutions instead of just relying on what you've been able to memorize.
Understanding theory is what you'll need if you want the artform to evolve. And I need it to evolve, because I want to feel challenged again.
This concludes part 3.
Back